Adsense Ads not Showing on BLOGGER and how to Fix it and 6 reasons why not showing

Almost every publisher of the Adsense program must encounter blank ads for a reason on their blog. There are lots of reason why you can have google ads not displaying on your blog.
As we all know that Adsense is one of the best contextual ad networks that we have they boast of sharing thieir profit gotten from the advertisers on a 70% to 30%.
Not only been the best network, they can be very hard to get full approval. You can place your Adsense code anywhere in your blog. I have heard a lot of people complaining about their Adsense ads not showing on their blog, So I compiled 6 causes why you are having blank ads on your blog.
Causes of Adsense Ads not Showing


1. Buying a Custom Domain
This is the major reason why 90% of people have their google ads not displaying. If you got your Adsense approval like a Host platform like Blogger, For example, you got your Adsense approval with (www.example.blogspot.com) in other for you to display ads on (www.example.com) you will have to apply for a Non-hosted account
From the time that you purchased the custom domain, you will continue to see blank ads till google team finish reviewing your site and accepting it, if they reject your blog you will either have to remove the ad code and work on fixing the reason why you were rejected and apply again.


2. The Ad Code was Newly Created
You should have noticed that anytime to generate a new ad code and paste it on your blog, for a while it will show blank ads because the code was newly generated. 
So you will have to wait for some time, close to 30mins -1hr before you start to see like Ads. And if yours is taking a long time you can contact Adsense or Send them a feedback on your Adsense dashboard.

3. Adsense Bot didn't Find relevant Ads for your website
If you are trying to create a new code in google Adsense under backup ads you will see where you chan choose what to display if
 The ads that you'd prefer to show when Google has no targeted ads available. By default, we'll show a blank space. However, you can also choose to display ads from another URL or a solid colour instead.
So if Adsense bot doesn't find relevant ads to display to your content it will just show blank ads instead. To fix this you must make sure that the website that you are trying to implement the code has sufficient content has a targeted niche.

Also see: How to Place Adsense Below Post Title in Blogger

4.  The Web Page is Violating their Policy
Adsense have stated in their program policy that website based on some niche should not apply for the program.
So if the discover that you have implemented your as code a website that is violating its policy, they tend to show blank ads on those websites. They Adsense team will them mail you and ask you to remove it or risk your account been ban.

5. Newly Accepted to the Program
If you just got accepted into the AdSense program and you are trying to implement the ad code on your website and you discover Adsense ads not showing, don't panic just relax , it takes a while before they finish compiling your account.
And if it's taking a longer time you can contact them directly or send theme a feedback.

6. Generated Ad code Might be Bigger than Ad Space
If you generated a 720*90 ad code and you are trying to put it on your side which can contain only 300*250, in most cases that would resolve to display blank ads.
You can fix it by generating the required ad size for a particular ad space.

I hope this article was Helpful?
Dont forget to share if you found a reason to

SOLUTION-Playstore Crashing on BLACKBERRY 10


Recently, some users have been experiencing an issue with the Play Store crashing, “Unfortunately, Google Play Store has stopped.” The crash occurs when downloading or updating an app though the Play Store. To fix, simply uninstall the existing Play Store and install the new version here (do not update):

⧭⧭⧭⧭PLEASE COMMENT FOR ANY ISSUES⧭⧭⧭⧭⧭ 

PLAY STORE FOR BLACKBERRY INSTALL GOOGLE PLAY STORE TO BLACKBERRY 10


INSTALL GOOGLE PLAY STORE TO BLACKBERRY 10


Learn how to install the Google Play Store to your BlackBerry 10 phone such as the Z10, Z30, Z3, Q5, Q10, P9982, P9983, Passport, Classic, Leap, Priv, and more! BlackBerry users may have noticed that the BlackBerry World app store is very limited but now you can sideload the Play Store to your BB10 phone. Follow our easy, step-by-step tutorial to get access to the best Android apps like Google apps, Instagram, Clash of Clans, or Candy Crush.
Once the Google Play Store is installed to your BlackBerry, you will be able to download and install Android apps and update them as well.

Install Google Play Store to BlackBerry 10

Requirements
  • BB10 device running BlackBerry OS 10.3 or later.
1. Go to Settings > App Manager > Installing Apps > and turn on ‘Allow Apps from Other Sources to be Installed


2. Open a browser and download Google Play Services APK:
3. Open the file and press Install
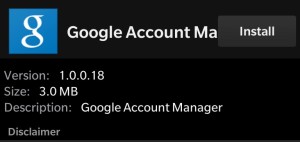
4. Open a browser and download Google Account Manager APK:
5. Open the file and press Install

6. Open Google Account Manager and sign into your Google Account


7. Exit and download BlackBerry Google ID APK:
8. Open the file and press Install

9. Open Blackberry Google ID and press Register this device

10. Exit and download Google Play Store APK:
11. Open the file and press Install
That’s it! You will now have access to the Play Store on your BlackBerry phone. You can now download, update, and purchase apps with your phone. Please note that not every app will run on the BlackBerry.

Common Issues:
Recently, some users have been experiencing an issue with the Play Store crashing, “Unfortunately, Google Play Store has stopped.” The crash occurs when downloading or updating an app though the Play Store. To fix, simply uninstall the existing Play Store and install the new version here (do not update):
Thanks to Cobalt232 from CrackBerry forum for making this possible.

Clear Or Refresh Your DNS Cache


Sometimes, when we have a blog published to a Google Custom Domain, we'll make a change to the domain DNS configuration and notice that our readers can see the change, but we can't.
Once again, at 6:23, someone was able to see my blog and leave a comment

Yet, moments after I tried, I was still getting the 404 error. So there seems to be some intermittent activity!
This is not an unusual report.

Problems with custom domain publishing almost always involve some sort of DNS issue.

Let's look at a hypothetical domain DNS configurations, as one example. First, current:
mydomain.com.   14400   IN      A       216.21.239.197
www.mydomain.com. 14400      IN      A       216.21.239.197 

Then, new:
mydomain.com.   14400   IN      A       64.233.179.121
mydomain.com.   14400   IN      A       72.14.207.121
www.mydomain.com. 14400      IN      CNAME   ghs.google.com. 

Note that the above addresses have long since changed. We now have a quadruplet "A" address complement - which is a bit harder to notice, casually.

A TTL of 14400 seconds (4 hours) is a bit extreme. I see mostly 3600 seconds (1 hour), sometimes 900 seconds (15 minutes), in most DNS configurations.

If the TTL for your domain is 4 hours, it could be about that long after you make the change, before you start seeing any change.

I say "about", because the age of the configuration information, as cached on your computer or server when you make the change, is relevant. If the information is 15 minutes old, then with a TTL of 14400, you'll have to wait another 13500 seconds, or 3 3/4 hours. If the information is 3 hours old, you'll wait merely another hour.

Fortunately, you can hasten that if if the cache on your computer is the bottleneck.

From a command window, enter
ipconfig /flushdns
If the DNS cache in question is on your computer, it's gone now. The next time that you try for your custom domain, it should come up in its new configuration.

Note 2 Caveats

  • If you have a caching non-authoritative DNS server that your computer retrieves DNS directly from, you'll still have to wait. The "ipconfig" command works only under Microsoft Windows, and only on the computer with the cache. If the cache is upstream from you, you're going to have to remain patient.
  • Whether or not your local DNS cache, and your upstream non-authoritative DNS server gets the updates, you still can't predict the update status of the Google non-authoritative DNS servers.

Knowing your DNS setup is a good idea, when working with custom domains. And allowing for DNS latency at Google is essential.

About IP addresses


About IP addresses

An IP address (short for Internet Protocol address) is used to identify computers on the Internet. It works like a return address would on a piece of mail.

How IP addresses work

When your computer or device sends a request, like a search on Google, it tags the request with your IP address. That way Google knows where to send the response.

How Google uses your IP address

Your IP address is usually based on a real-world location. Google might use your IP address to guess where you are and give you local results.
For example, Google could use your IP address to give you the weather forecast for the town you're in when you search for weather.

What an IP address looks like

Your IP address will be a number, like 172.16.254.1 or 2001:db8:0:1234:0:567:8:1.

Find your IP address

When you search what is my IP on Google Search, you’ll see the IP address of the computer or device where you did the search.

IMMA_NIKE| Download Iroot For PC and ANDROID APK – Install iRoot on Windows 8.1/10/8/7

iRoot for PC V2.0.9: Those who are using lower android versions of mobiles, they cannot install all versions of android applications on their devices, while installation of some apps, you may see error message like your device is not compatible with this version, that time you may get irritate right? So here I am providing the information about how to install all android applications on your lower android mobiles. To install apps or access blocked features, there is a process called rooting. Rooting is the main thing to your mobiles to access any android apps. Here in this tutorial I am using iRoot for PC V 2.0.9 latest version software and iRoot for windows 8.1, 10, 8, 7 computer, laptop
devices.


iRoot software was developed by Magyun team and they are currently they are running iRoot V2.0.9 latest version. iRoot android tool developers also made a another very popular rooting tool that is vRoot for PC & vRoot for windows 8.1, 10, 8, 7 laptop, computer. These both are same but, iRoot is the advanced version. Currently iRoot PC version is working very successively compare to other android root tools and iRoot for PC is one of the powerful android rooting tool. Using iRoot PC software, we can root our android mobiles very easily and safely. In android root tools, iRoot is the very famous & popular tool and now it is running over 1.5K+ android mobiles and on Tablets. In this guide I will give you complete overview of iRoot app and how to install latest iRoot for PC, windows 10/8.1/8/7 computer devices.

IROOT FOR PC, LAPTOP, COMPUTER, WINDOWS 8.1/10/8/7 DOWNLOAD FREE

Currently iRoot tool is the very popular because of its one click rooting process. Latest version of iRoot 2.0.9 software can supports android 2.2 to android 4.4 versions. With single click you can root your android phone and unlock more features. Therefore it is a very simple and efficient tool, so do iRoot free download for PC, windows 8.1, windows 10, windows 8, windows 7 operating systems.
Below you can find iRoot official download links for your windows PC, Android devices.
Follow Installation Steps for iRoot for PC/Laptop:
  • First of all download official iRoot setup files using above download link.
  • Download iRoot for PC
  • Download iRoot for Android
  • You can get it in the form Zip file, so extract it to your desire location.
  • Now double click on EXE file and continue installation.
  • It will ask you to select desired location for its storage on your windows computer, there select your suitable drive.

iroot-for-pc
  • Now wait and observe the installation of iRoot application on your PC.

IROOT (VROOT) FOR PC DOWNLOAD, IROOT FOR ANDROID ROOTING SYSTEM REQUIREMENTS

  • If you want to use iRoot (vRoot) tool? Then your android phone or Tablet should have 2.2 or 4.4 android versions.
  • Your PC or computer must run on windows operating system.
  • You need USB cable to connect your mobile to PC.
  • Should have latest updated USB drivers.
  • Make your phone battery above 50%.

HOW TO ROOT ANDROID PHONES USING IROOT (VROOT) ON PC

  • First you have to enable the option Debugging mode on your android phone.
  • Now connect your phone to PC via USB cable, it detects your device and start rooting process.
  • Wait for complete rooting process to your android devices.

IROOT APK V2.0.9 FOR ANDROID LATEST VERSION DOWNLOAD FREE

First you need latest iRoot V2.0.9 APK to root your android device. Now follow below APK steps for your android phone.
  • Download latest V2.0.9 iRoot APK for android.
  • Now you need to do some change on your android mobile for its APK installation.
  • Go to Settings > Security > Unknown Sources and check mark on Unknown Sources box.
  • That’s it now install iRoot android APK.
Those are the steps to install iRoot for PC, iRoot for windows 8.1, 10, 8, 7 laptop computer. It is a very trusted and successful root tool for android devices. Hope you installed iRoot APK on your android using above method. If you have any errors while installation of iRoot on PC/Android? Then comment us we will help you with in hours.


VAN_NEWS; YouTube kills the video editing tools you never use

Unless you're a YouTube power user, you may not have known that the site had the Video Editor and Photo slideshow tools to create finished video projects. Now that you've learned that, I'm afraid to say that those tools are about to get the axe. If you're currently cutting a project, you have until September 20th to finish and publish it, Google notes on its YouTube support pages.
As for why the tools are going away, it's likely that not many folks were using it. Web video editing is hella slow compared to native applications, because you have to upload your video and download the final copy. That said, it was a good option for Chromebook users or folks with underpowered laptops or tablets.
However, Google points out that "there are many free and paid third-party editing tools available if you're looking for new editing software." In other words, the app was useful to as a way to get folks on board YouTube when it came along in 2010, but with more apps out there, it's no longer worth the resources.
If you're willing to pay and have a decent PC or Mac, other standalone apps include Adobe Premiere CC, Apple's Final Cut Pro X for Mac only and Avid's professionally-oriented Media Composer. Avid also has a free app called Media Composer First, Apple has iMovie for Mac and Clips for iOS, while Microsoft has Movie Maker for Windows. If you just want a web editor, there are options like Magisto and WeVideo that work on most browsers, including the Chrome browser on Chromebook.
Video Editor and Photo slideshow are heading to Google app heaven along with Spaces, Windows and Mac Chrome appsand Google Reader (RIP). However, at least Google is keeping its Enhancements app that can filter, blur and trim videos, to keep the social media crowd happy.